This article provides a step-by-step guide to enabling and configuring 101domain as a Web Application integration within your Okta account. By following these instructions, you can securely connect your Okta account for streamlined single sign-on access.
During this configuration, you will need to go between your 101domain account and your Okta account. Please keep two windows or tabs open so you can switch between accounts.
Okta Requirements
Before you begin, you will need to have Administrative Permissions in your Okta console to add a new application in your Okta account for you and your users. If you do not have Administrative Permissions, you will need to contact the appropriate person in your organization to complete the configuration.
In order to connect your account and users, we will require the Client ID, Secret, and Discovery URL* from your Okta 101domain app. Only the individual(s) with Administrative Permissions can access this information.
*The term 'Discovery URL' might also be referred to as 'Well-known Configuration', or 'OpenID Provider Metadata' and will depend on the provider.
Supported Features for Okta
Service Provider-initiated SSO (Single Sign-On) Flow allows a user to access your 101domain account by authenticating through the Okta authentication flow.
Other features are not supported.
Configuration Steps to set up your Okta account
-
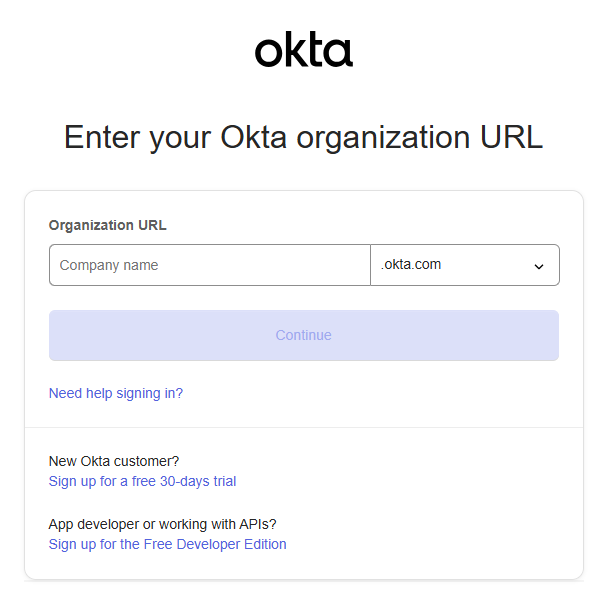
Log in to the Okta Admin Console using your organizations URL.
-
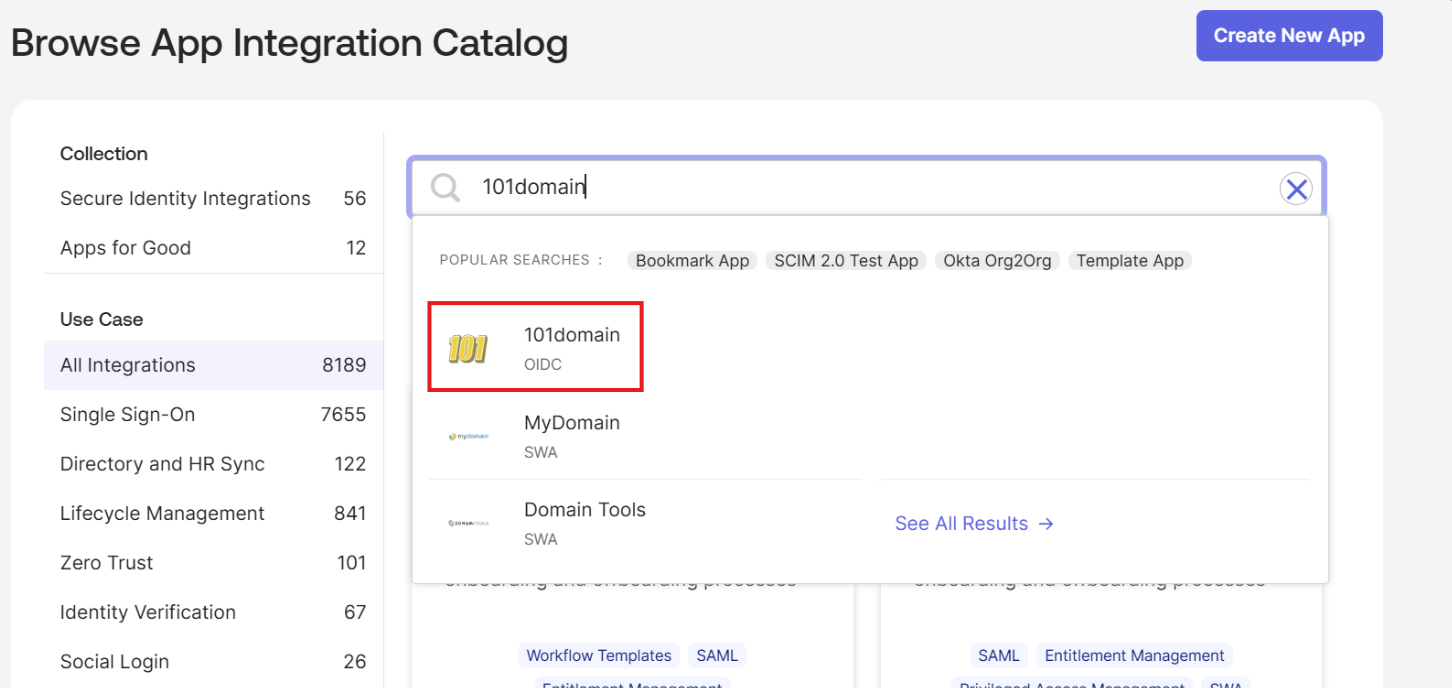
Navigate to Applications and click on Browse App Catalog.
-
Search for the 101domain official app and add it.
-
Assign the users or groups that should be able to log in to your 101domain account.
-
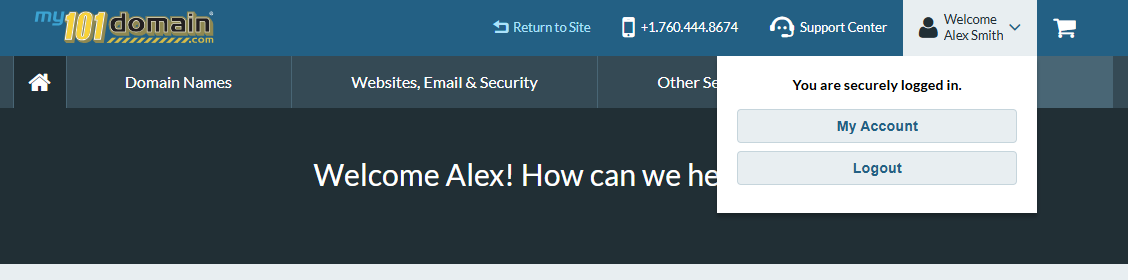
Login in to the 101domain account with your existing username and password.
Please note that only the Primary User listed with 101domain can configure SSO. If you are not the primary user, you will need to contact your organization's Primary User to configure the SSO feature following the steps below.
-
Navigate to the Welcome dropdown menu on the top right hand side and click on My Account.
-
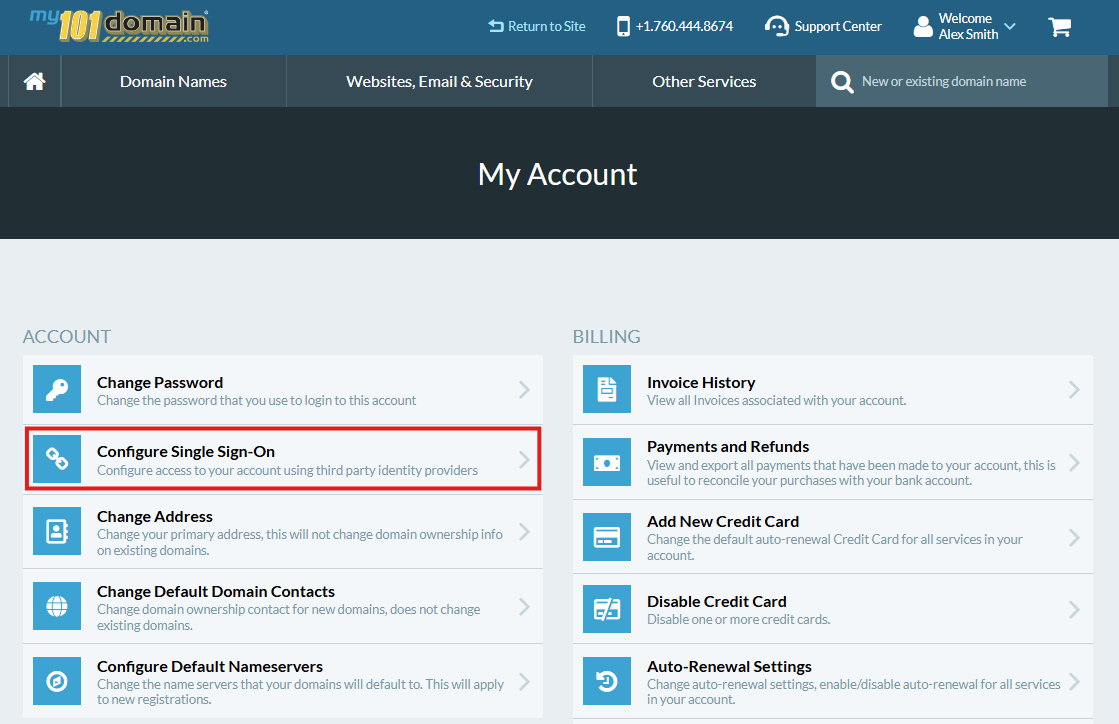
From the My Account menu, click on Configure Single Sign-On.
-
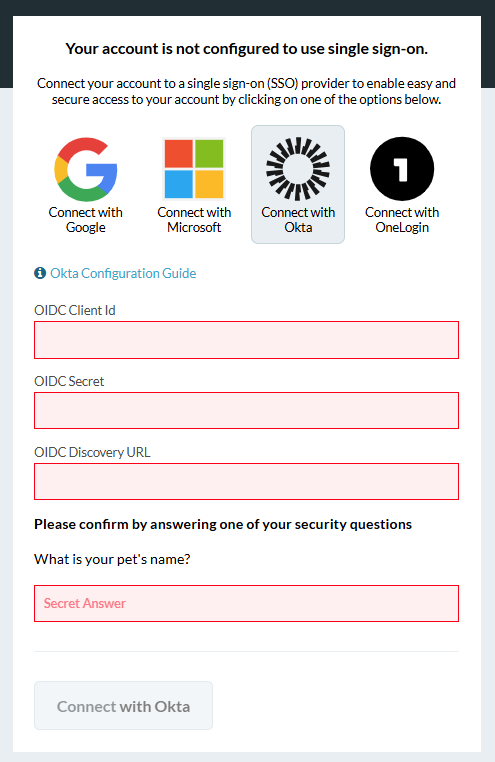
Click on the ‘Connect with Okta’ icon and complete the Client ID, Secret and Discovery URL* fields.
*The term 'Discovery URL' might also be referred to as 'Well-known Configuration', or 'OpenID Provider Metadata' and will depends on the provider.
You can find this information from the Okta 101domain App connection. In Okta, click through to the tab General to obtain these key details.
-
Enter your 101domain Security Question and click on Connect with Okta.
-
Your Okta is now connected with your 101domain account.
The Primary User can now sign in with Okta SSO.
The Primary User will need to enable any sub-users of the organizations 101domain account to sign in with Okta SSO. For more information, visit our article Managing User Access and Enforcement.
Important Notes
-
Each user must be enabled in the 101domain account prior to logging in with Okta SSO.
-
The Primary Account owner can allow each user, including themselves, to log in with:
-
Okta SSO only, OR
-
either Okta SSO or username and password.
-