Linking your Office 365 service to a domain using 101domain's name servers is relatively easy and this guide will help you walk through the process.
A note on TTL, You will notice that in this guide, we leave the TTL value set to 6 hours, the default value for our name servers.
We do support lower TTL values if you expect to change the records in the near future, but for most scenarios, the TTL value is not important.
This guide will use the records found within this corresponding guide from Microsoft:
https://docs.microsoft.com/en-us/office365/admin/get-help-with-domains/create-dns-records-at-any-dns-hosting-provider
Steps
-
To start, ensure that you've added your domain name to your Office 365 subscription.
-
Navigate to your 101domain account, click on Manage Name Servers, Choose your domain, and then choose, "I want to edit my name server records"
-
Add your first record, the MX record.
-
At the top, line, change the record type to MX
-
Enter 0 for the priority,
-
For the Value, enter
<example.com>.mail.protection.outlook.com -
Click Save to finish adding the MX record.
-
-
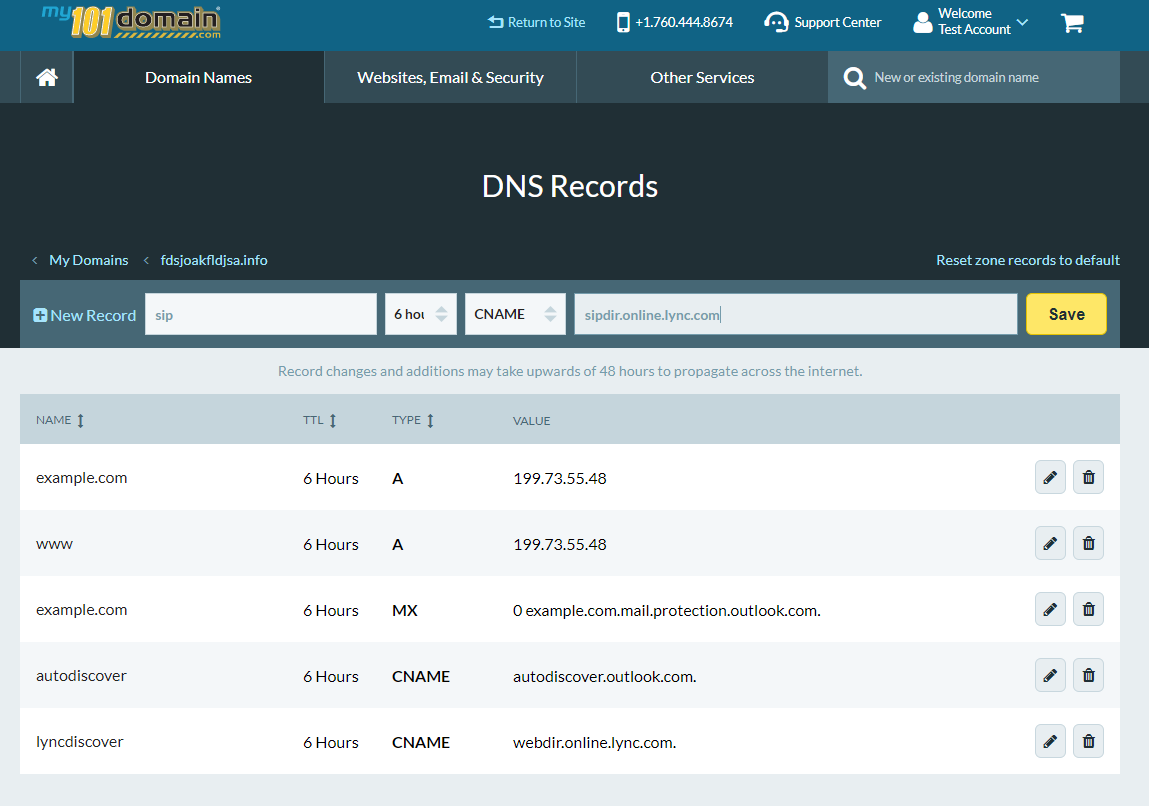
Next, add the 3 CNAME records
-
In the first box for Subdomain, enter the Host field of the first CNAME record, in this case it is the word autodiscover
-
Ensure the record type is set to CNAME
-
In the last box, enter the "Point To" address, autodiscover.outlook.com
-
Click Save to the far right, then empty out the boxes and repeat the steps for the other two records
Subdomain/Host
Value/Points to
autodiscover
autodiscover.outlook.com
lyncdiscover
webdir.online.lync.com
sip
sipdir.online.lync.com

-
-
Add a TXT record for SPF
-
Ensure that the first box for subdomain is blank
-
Set the record type as TXT
-
In the value field, enter:
v=spf1 include:spf.protection.outlook.com -all
-
-
Add the SRV records
Subdomain/Host
Priority
Weight
Port
Value/Points to
_sip._tls
100
1
443
_sipfederationtls._tcp
100
1
5061
-
Ensure the first box for subdomain is blank
-
Set the record type as SRV
-
In the subdomain box, enter
_sip._tls -
Set the Weight to 1, set the priority to 100, and set the port to 443
-
In the last box, enter the target:
sipdir.online.lync.comand click Save
-
-
Add the second SRV record
-
Ensure the first box for subdomain is blank
-
Ensure the record type is SRV
-
In the first box for subdomain, enter
_sipfederationtls._tcp -
Set the weight to 1, set the priority to 100, and set the port to 5061
-
In the last box, enter the target:
sipfed.online.lync.comand click Save
-
-
Wait for the changes to propagate and then verify through Office 365