How to modify your name server records if your domain is using our 101domain or our internal Cloudflare name servers (Secure Web Accelerator).
Steps
-
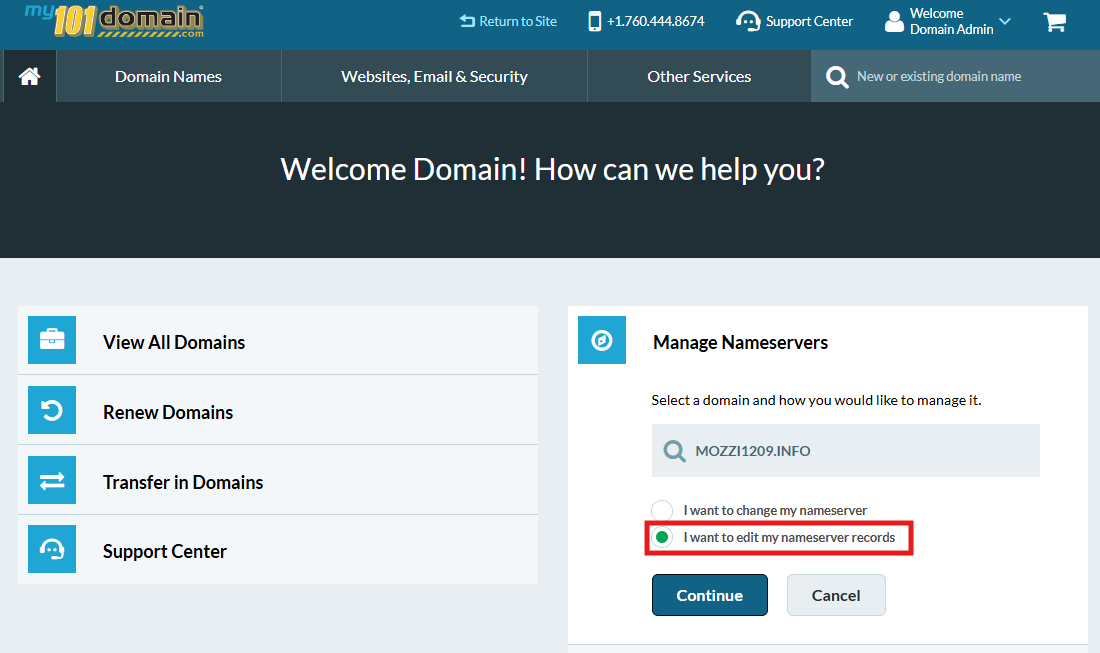
Click on Manage Name Servers

-
Click the domain name you wish to modify the DNS records for.
-
Change the selection to "I want to edit my name server records" and click Continue
-
If your domain uses our 101domain name servers or our internal Cloudflare name servers, your records will be displayed. By default, domains will start out with two DNS “A” records displayed, one for www (subdomain) and one for the domain without the www (root). These default “A” records are used to show the parking page for your domain.
-
If your domain uses 3rd party name servers, please contact your hosting provider to manage your name server records.
Add, Modify, or Delete a Record
-
Add a new DNS record using the New Record form.
-
Modify an existing record using the pencil icon at the right of a record entry.
-
Delete an existing record by clicking the trash icon at the right of the record entry.
NOTE: If you are replacing existing records, please make sure to delete the old record by clicking the trash icon to the right of the record entry.
For more information on the types of DNS records and a brief description, please visit Name Server Record Types.
If you need further assistance, please Contact our Support Team.