
Setting up your OnDMARC notifications correctly is an important step in proactively monitoring your email delivery. This guide outlines the process for setting up and customizing notifications within OnDMARC to ensure you stay informed about your domain security and compliance status.
We recommend setting up weekly Compliance Reports at a bare minimum to help you stay on top of your email delivery.
Creating the Notification
-
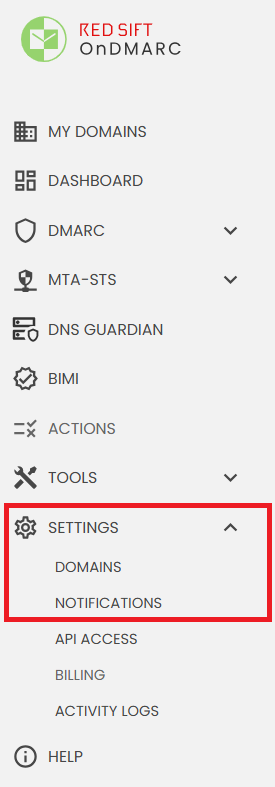
To begin, navigate to the Settings menu on the left-hand sidebar of your OnDMARC dashboard.
-
Go to Settings > Notifications.
-
Click the Add Notification button
-
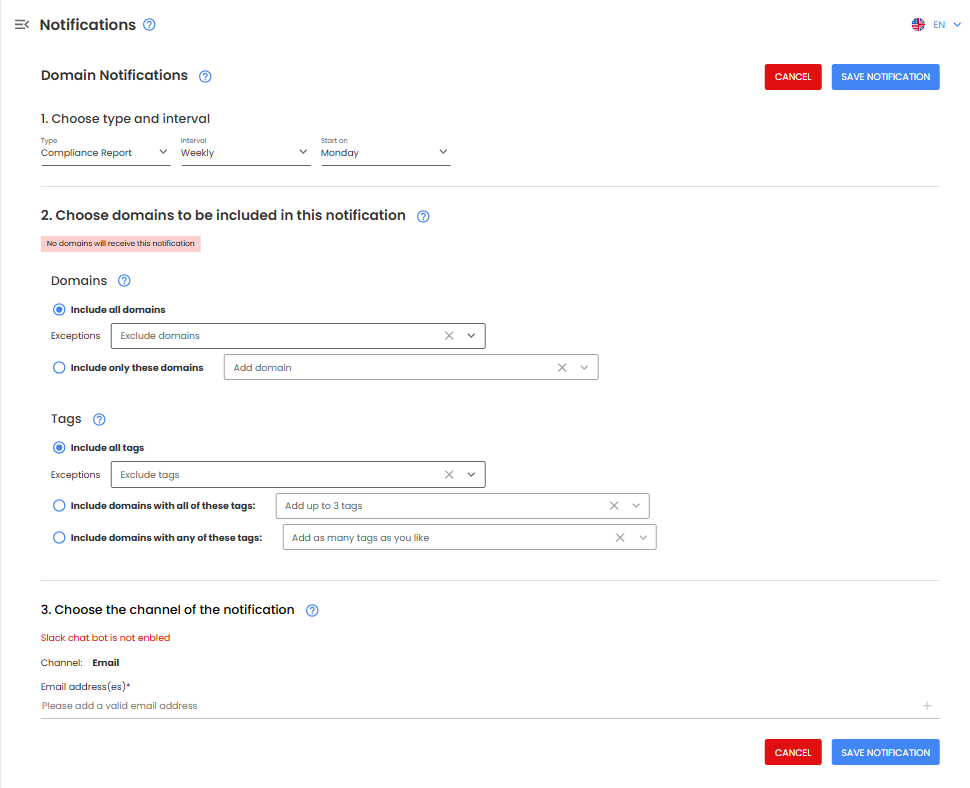
Select Notification Type: Choose from the four available alert types:
-
Compliance Reports: A roundup of passed, quarantined, and rejected mail volumes.
-
Actions Reminders: A list of outstanding tasks required to secure your domains.
-
Configuration Alerts: Notifies you if new services start sending on your behalf or if an asset's compliance drops.
-
Threat Intelligence: Alerts regarding senders with bad reputations using your domain.
-
Set Interval: Choose between Daily or Weekly. If you select weekly, specify the preferred Day of the week for the delivery.
-
Select Domains & Tags: Control which parts of your infrastructure trigger these alerts to avoid "notification fatigue."
-
All Domains: Receive alerts for every domain managed in your account.
-
Specific Domains: Manually pick individual domains from your list.
-
Domain Tags: If you have organized your domains using tags (e.g., "Production," "Marketing," or "Regional"), you can choose to include only domains that contain a specific tag.
-
Choose a Delivery Method: Decide where your alerts should be sent.
-
Email Notifications: You can specify one or multiple email addresses. This can be your personal work email or a group distribution list (e.g.,
security-team@company.com) to ensure the right people see the data. -
Slack Integration: To receive alerts directly in a Slack channel, you must have the integration configured beforehand:
-
Click the Integrations button (or follow the prompt in the notification setup).
-
Follow the authentication steps to connect OnDMARC to your Slack Workspace.
-
Once connected, you can select the specific Slack channel for your alerts.
-
-
Click the Save Notification button to save your new configuration
NOTE: For a deeper dive into what each alert contains, visit the Red Sift Community and search for "OnDMARC Notifications." You will find detailed articles explaining the logic behind each alert and troubleshooting tips for configuration.